Grating Grades
These settings are stored for your currently selected Connnection design method.
- General Overview
- Tips and Tricks
- Related Tools
To add a new Grade Type or Grade, right-click inside the table and select Add Grade Type or Add Grade.
Settings
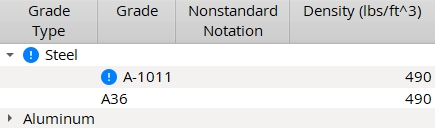
Grade Type: Any text string (up to 29 characters) to denote the name of the grade type (e.g., Steel, Stainless, Aluminum).
Grade: Any text string (up to 29 characters) to denote the name of the grade (e.g., A36 , A401 , Peter , Joe , whatever name you want). Grades entered here are selectable ( ![]() ) (in Home > Project Settings > Fabricator > Stair Treads ) and on the Grating Tread Material window (in Modeling ).
) (in Home > Project Settings > Fabricator > Stair Treads ) and on the Grating Tread Material window (in Modeling ).
Nonstandard Notation: Any text string (up to 29 characters) to denote that a particular grade is not the standard grade.
Density: The density value of the grade. If you are using imperial dimensioning, density is measured in lb/ft3. If you are using metric dimensioning, density is measured in kg/m3. The value you enter for density is used to calculate material weight.
| For submaterials: A callout is generated next to that material's submaterial piecemark callout on the member detail when Home > Project Settings > Fabricator > Piecemarking > Member and Material Piecemarking > Submaterial > |


|
|
OK (or the Enter key) closes this screen and applies the settings.
Cancel (or the Esc key) closes this screen without saving any changes.
Reset undoes all changes made to this screen since you first opened it. The screen remains open.
- To delete a grade, left-click to select the grade, then right-click and select Erase grade.
- To move a line up or down in priority: Left-click to select the line and hold down the left-mouse button, then drag the line up or down.
- Cut ( Ctrl + x ), copy ( Ctrl + c ) and paste ( Ctrl + v ) are available to help you more quickly edit grades.
- There are no Fy or Fu values on this window. This is because connection design does not reference a grating tread's Grade. The usual reason to assign a grating tread a Grade in its stair tread definition is so that tread will have its Grade listed in a stair's bill of material.
- Red or yellow exclamation point icons
 or
or 
- Stair Tread Grade
- Grating material grade
- Grating Tread grade
- Change Grade
- Grade (Status Display)
- Material grade (Status Display)

